Time reports > Time reports for payroll
The following explains how to view and handle the overtime assignments of employees. The booked work hours can be viewed in the time reports. During browsing Tuntinetti checks for you that employees' labor agreements are in order. This instruction explains also how you can add labor agreement settings to an employee and have Tuntinetti make the labor agreement checkups.
There is an instruction video about the topic here: Approving work time and overtime hours - Tuntinetti
Selecting the time period and the employees
To view reports you must set a time period and choose employees. After that you can have Tuntinetti set up the desired reports of the employees from the desired time period.
Selecting a time period
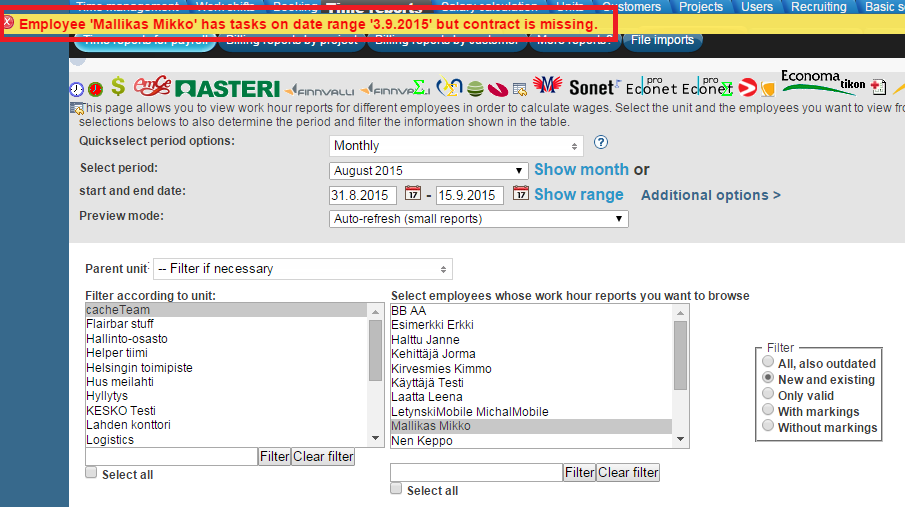
First you must choose the time period of the report. The report can be viewed by clicking "Show month". In the period selection drop-down window you can choose a period to be shown:
- Monthly
By setting the start and end dates you can easily view reports between precise dates. To view the report with start and end dates click "Show range".
In the preview mode settings you can decide if the reports will be refreshed to the page automatically, on-demand or download only. This can be useful if the reports are large and page refreshing takes a lot of time.
Selecting employees
Employees can be selected in the windows in the lower part of the page. First you must filter employees by selecting a unit or units. Units and employees can be searched with a word search under each selection window. By clicking "Filter" the window is updated matching the word search and "Clear filter" resets the window. "Select all" selects all of the objects. You can also filter with validity from the right side selections and with parent units from the "Parent unit" drop-down list if needed.
You can also select multiple objects while searching. Consecutive rows can be selected painting them with mouse or with the SHIFT-button and multiple single rows with the CTRL-button.
Tuntinetti informs if the selected employees have work shifts or other tasks without a valid contract.
It is necessary to enter the contract information so that Tuntinetti can do labor agreement checkups to the reports. Without the information of the collective labor agreement concerning the employee the program can't analyze work hours.
A work contract and a labor agreement can be added in the Users tab in the employees sub tab in the employees information. An instruction on how to add a work contract can be found in the Employees manual. There is also an instructional video on how to add a new employee, https://www.tuntinetti.fi/demot/perusominaisuudet_tyontekijan_lisays.htm?locale=en. This video includes instruction on how to set the contract settings to a new employee.
Adding overtime assignments
If the contract information is up to date, Tuntinetti can check if employees have worked overtime. If they have the program suggests to assign a new overtime assignment.
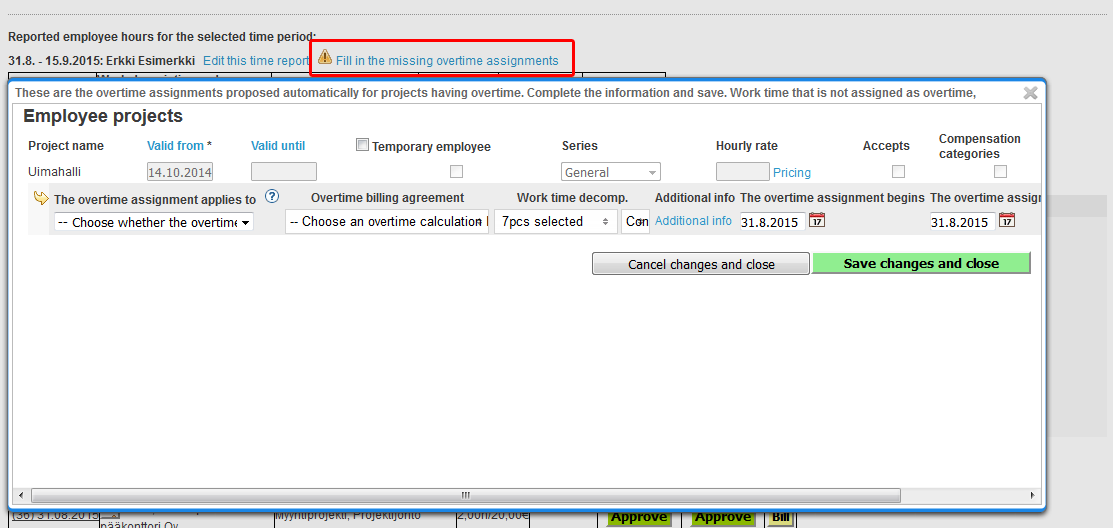
You can give an employee an overtime assignment by clicking the "Fill in the missing overtime assignments"-button.
You can assign overtime assigments on different levels:
- Unit level
- Project level
- Employee level
You can assign temporary overtime assignments by setting them with a start date and an end date.
An employee can have the authority to assign his or her own overtime assignments with a web form or with a timestamp.
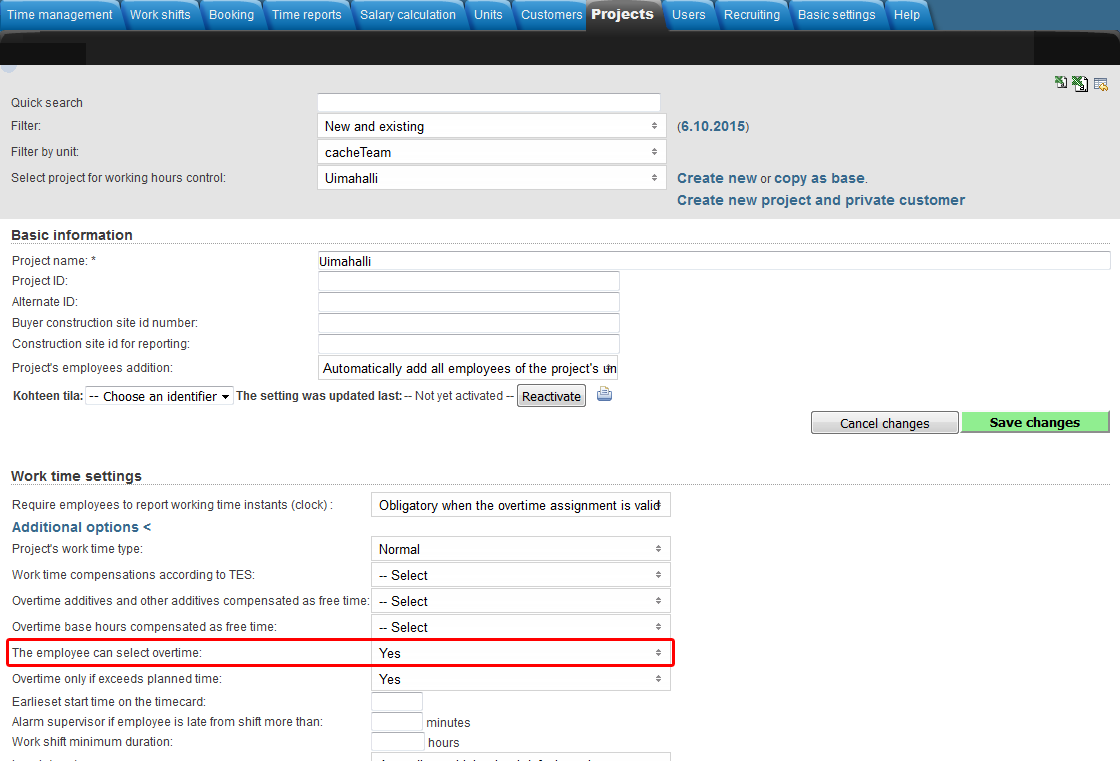
You can activate the employee's authority to assign overtime assignments in the Projects tab in the work time settings.
In the work time settings' additional settings there is a setting "The employee can select overtime", where it can be turned on.
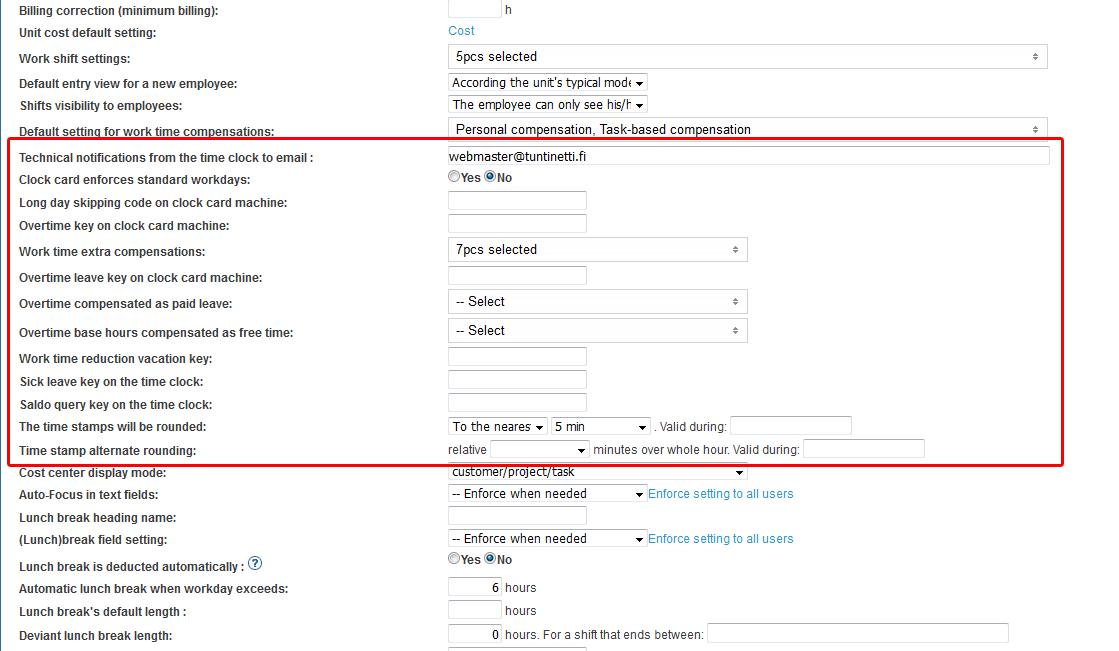
The time stamp or clock card settings can be found in the Company's basic information settings.
The settings of an overtime assignment
- What the overtime assignment applies to. Only the employee's salary, only the invoice report or both.
- Selecting the overtime billing agreement.
- Selecting the work time compensation.
- Selecting the hour considering.
- Additional info's overtime compensations.
- The length of the overtime assignment. Tuntinetti automatically suggests the start date and end date to be on the dates that the employee has been working overtime.
When the overtime assignment has been given Tuntinetti can itemize the overtime hours according to the given overtime assignment and the active labor agreement.
Warnings concerning overtime
It is possible to set a confirmation for hour entries that exceed the working day recorded by the supervisor, which can be found in the Company's basic information, under Reporting settings:
With this setting, a warning appears to the supervisor if the work time recording or shift includes either overtime, weekly rest allowances or budget overruns:
The confirmation is shown in the Work shift planning and the Time reports.
Approving the hours on a time report
If the report has everything in order you can approve booked work hours. Approving hours locks them for payroll purposes.
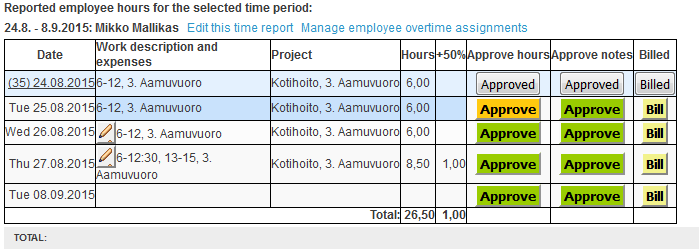
To approve hours in the report you must click the "Approve"-button. Clicking an approve-button approves all of the hours to the date selected.
When the button is green none of the hours have been approved. Orange means that some of the projects have been approved. When the button is grey all of the projects of the day have been approved. Approving hours locks the notes too.
You can cancel the approved hours or approved notes by clicking the grey "Approved"-button. Cancelling approved hours cancels all of the hours to the selected date. Hours will be canceled from bottom to top.
Approving hours by project
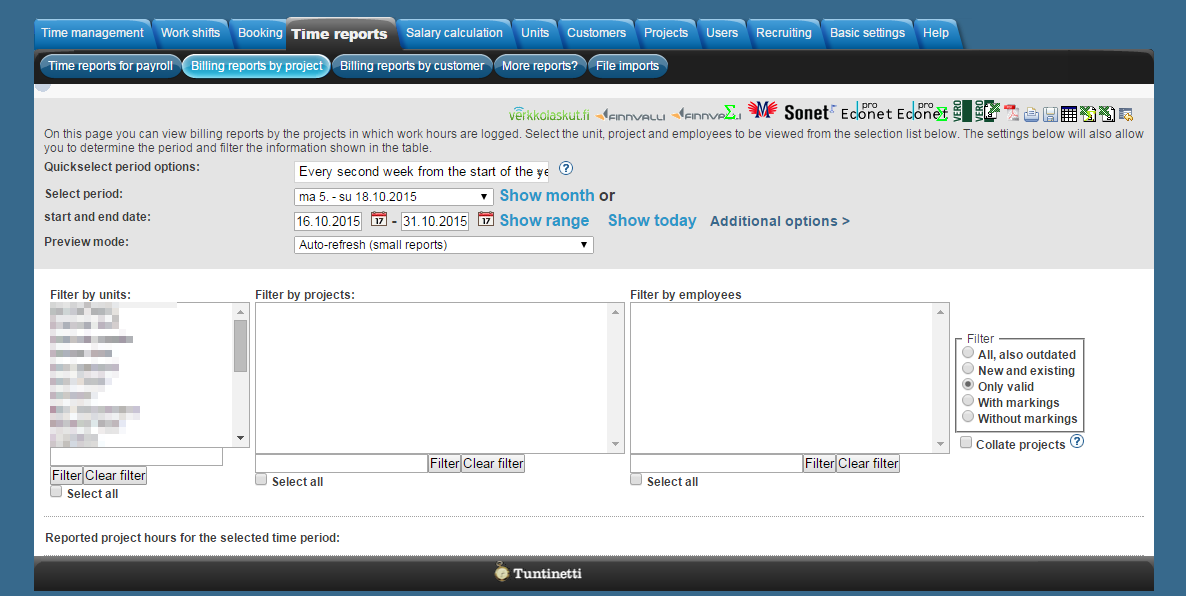
In Tuntinetti it is possible to approve employee's work hours in different projects separately. This can be done in the Billing reports by project tab.
If the employee has work hours in several projects, you can itemize the work hours by projects.
Select the date in which the employee has work hours in more than one project and select a certain project. The work hours of this project can be approved separately from another projects with the "Approve" buttons. When you have approved project's work hours, the time reports for payroll will have the employee's work hours indicated with an orange color for the selected day. This means that a part of the day's work hours have been approved, but not all.
Modifying timestamps
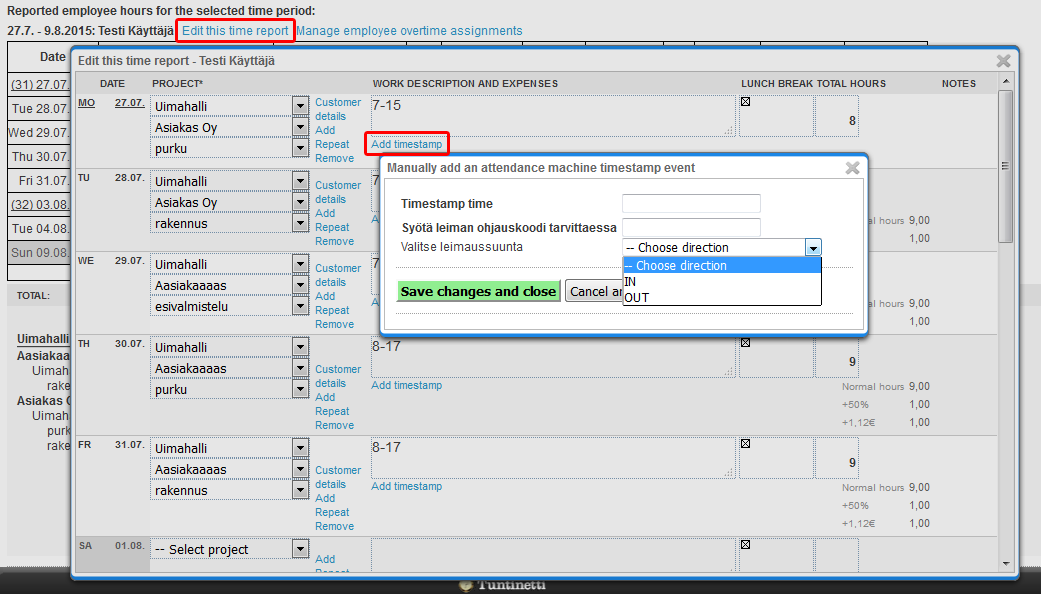
A supervisor can edit timestamps by clicking "Edit this time report". Adding a timestamp or other alterations can be useful if an employee is missing a timestamp or there is some other problem with the timestamps.
In the time report's modification window a supervisor can edit the hours. Work hours must have a project and a task if needed. After setting a project and a task you can add a new timestamp by clicking "Add timestamp".
Exporting reports from Tuntinetti
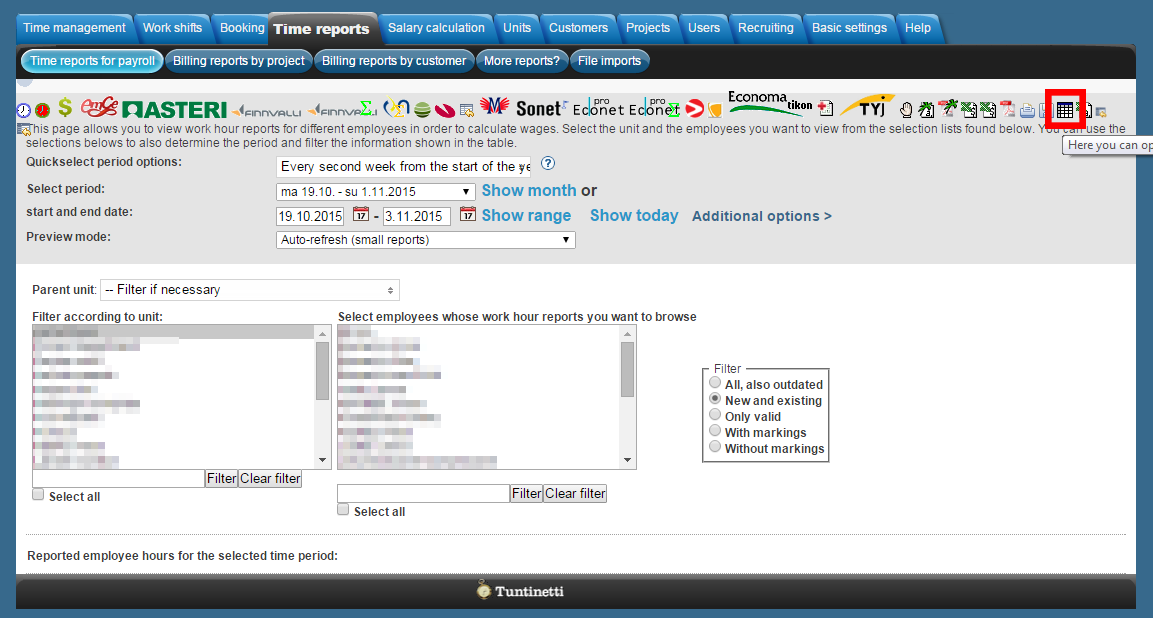
You can export reports from Tuntinetti for example to Excel or download them in PDF-form with the icons on top of the page.

